- Home
- Paint a Rose
how to paint a rose secret
Mastering the art of how to paint a rose opens the gateway to painting a myriad of colorful roses.
In this guide, we will focus on two popular varieties: the classic red rose and a multicolored rose that many find captivating.
The secret to painting beautiful roses is in the drawing. Practice drawing and painting roses from live flowers, artificial roses or good-quality photographs.
Get their shape firmly in my mind, then the painting will go smoothly.
 You Can Paint a Rose
materials for the rose paintings
These paintings are on 8x10" stretched canvas. Canvas panels work well for practice too.
Flat brushes are handy for painting roses.
This tutorial is for oil and alkyd paints. It may also be used for acrylics. The paint colors are listed with each rose.
You learn how to paint a rose, beginning with a red rose or the multicolored rose.
how to paint a red rose
You may either draw the rose directly on the canvas or transfer your drawing to the canvas with graphite paper.
Lay out the following colors on your palette:
- Cadmium Red, Cadmium Red Light
- Permanent Rose, Alizarin Crimson
- Viridian Green, Cadmium Yellow
- Titanium White and Mixing White
A disposable paper palette makes clean-up a snap.
create a roadmap by underpainting
An Underpainting is a layer of very thin paint that lays out the values and colors of the rose.
It is like a blueprint or a roadmap to the finished painting.
Squint and look at the rose. Squinting will allow you to distinguish between light and dark values.
Then proceed with the underpainting.
 Underpaint the rose
Use a solvent to thin Alizarin Crimson for the petals and Viridian Green for the leaves and stem.
Underpaint the petals. Just barely touch the highlight areas with almost no paint at all. The darker areas will require a second layer to make them darker.
Underpaint the leaves and stem in a like manner.
The underpainting indicates what the finished painting will be.
It's easy to make any drawing corrections during the underpainting.
Use a clean brush dampened with solvent and brush out what needs to be changed. Wipe off the remaining solvent and paint with a paper towel. Then paint the correction.
Let the underpainting dry before the next step.
painting the rose
When you squint looking at the rose, what areas look the darkest?
Go up the page and look at the values on the red rose.
Paint the dark areas of the petals
 Paint the darkest areas
Use Cadmium Red or Cadmium Red Deep to paint the darkest areas of the petals.
This time, use only enough solvent or medium to make the paint flow, just a tiny bit.
Paint this layer thin, so we can paint the shadows in the next step.
This is how to paint a rose - layer by layer.
paint the shadows
Mix Alizarin Crimson with your Viridian Green to make a dark color, almost black.
Use a small amount of this color with no solvent or medium.
 Paint the shadow areas
Paint the shadows in the dark areas we painted in the previous step.
Use just a small amount of paint on your brush. Paint it on gently. If you stroke too hard, the previous color will pull off.
Then, wipe the excess paint off the brush with a paper towel. Don't clean the brush with solvent. If you do the solvent will pick the color up when you blend.
Use the wiped brush to gently blend the line between the shadow and non-shadow areas.
If you can't seem to make it blend, the paint probably is too thick. Let it set a bit. Go on to the next step and blend later.
paint the light areas
Accentuate the light areas of the petals with Cadmium Red Light. Don't paint the edges yet.
Cadmium Red Light has an orange tint to it compared to Cadmium Red. If you don't have Cadmium Red Light, mix yellow with Cadmium Red.
 Paint the light areas
paint the edges
The edges and flipped over areas of the petals are lighter, yet.
Mix Permanent Rose with some Mixing White for the petal edges.
Mixing White is made with zinc white. It lightens the reds without cooling them or making them look chalky, like Titanium White does.
Using the edge of a flat brush, held upright, works well for painting the thin edges.
If the shadows still need to be blended, go back and blend them now. This is how to paint a rose that looks more realistic.
paint the green parts of the rose
Paint the leaves and stem with a mixture of Viridian Green, Cadmium Yellow, white and any red to make a natural green color.
Add some of the previous shadow mix on the
shadow parts of the leaves and stem. (Next image)
paint the background
Paint the background while the rose is still wet, so we will be able to blend the edges.
 Finish with painting the background.
Mix any of the reds, green or yellow with Titanium White to paint the background.
It's fun to put a variation of colors into the background for visual interest.
Then using a soft dry brush, gently blend the edges of the rose into the background. This is how to paint a rose, that doesn't look pasted on.
how to paint a rose with multiple colors
The process for painting a multicolored rose follows a similar sequence as the red rose.
 Multicolored roses are fun to paint.
The color palette will include Lemon Yellow, Cadmium Yellow, Yellow Ochre, Permanent Rose, Alizarin Crimson, Viridian Green, Titanium White and Mixing White.
start with a roadmap
Do an underpainting with very thin paint that has been thinned with your solvent.
Notice each separate petal contrasts dark against light in the petal next to it.
Painting the contrasting values is one of the most important aspects of painting roses.
 Underpaint the rose
Use thinned Lemon Yellow or Permanent Rose on the light edges of the petals.
Mix Alizarin Crimson and Yellow Ochre for the dark areas.
Viridian Green and Cadmium Yellow make the leaves and stem.
The underpainting now looks like a rose. It's a roadmap of what to paint where.
Take a break and let the underpainting dry. I usually have lunch while it dries.
painting the rose
Start painting after the underpainting is dry. The thinned paint dries quickly.
paint the dark values
Mix Alizarin Crimson and Yellow Ochre for the darkest color on the rose.
Thin the paint just enough to make it easy to paint on.
 Paint the dark colors.
It is important to paint in thin layers. Thick and gooey paint makes it hard to paint the next layer.
paint the medium values
Paint the medium and light pinks with a mixture of
Permanent Rose and Mixing White.
Mixing White used in moderation, lightens the colors without a chalky appearance.
Colors mixed with Titanium White can have a chalky appearance. Titanium White will be used in the background.
 Paint the medium values
Alizarin Crimson and Mixing White make the shadow pink.
Use the shadow pink where the petals attach. Also use it in the center of the bottom left petal to indicate a depression.
Using a dry brush, gently blend where the colors change to make soft transitions.
paint the light colors
Mix your light colors. Yellow and Permanent Rose make a clear orange. Yellow Ochre and Permanent Rose make the dusty oranges.
Use Titanium White with yellow or pink for the petal edges and the large center petal.
 Paint the lightest values
Softly blend the light colors into the colors already on the rose.
Paint, soften and blend the colors to give the fragile petal appearance.
Use the yellows, pinks and oranges however you want to make your own individual rose.
That's how to paint a rose and have fun!
paint the background
Paint the background around the rose before the rose paint dries.
Alizarin Crimson and Viridian Green with lots of white make a soft grey. See more about mixing neutral colors.
Softly blend the edges of the rose into the background with a dry brush. Then the rose won't look pasted on.
 Paint the background
Paint the leaves and stem with a soft green mixture of Yellow Ochre and Viridian Green.
Add a little pink in some places for a rust color. This helps co-ordinate the flower and leaves together color-wise.
The center leaf has one side turned up to show the underside. Paint it with your green lightened with white.
what did we learn?
Remember to practice drawing and paint roses regularly. Paint in delicate layers using the underpainting as a guideline. Painting light and dark values creates the form and parts of the rose.
These subtle techniques contribute to painting realistic roses. Enjoy the process of painting roses, while improving your skills and creating art that makes your heart glow.
Now that you have the tips and techniques, it's time to get started on painting a rose!
You may find some rose photos to draw or paint on the rose care page.
enjoy the roses!
more about oils
Paint a Hummingbird with Oils
Confidently learn how to paint a hummingbird with oil paints. Paint the beautiful iridescent colors of a male Broad-billed Hummingbird, a step-by-step tutorial.
Daisy Painting with Oils
Confidently do an easy daisy painting of white daisies with oils. Speed up your art journey while learning how to paint daisies with this step-by-step tutorial.
Paintings of Flowers
Paintings of flowers are very challenging, but such a joy to paint! Enjoy flower paintings of roses, daisies and more, watercolor and oil paintings by Carol May.
How to Paint a Butterfly with oils
Beginner and intermediate artists learn how to paint a butterfly, step-by-step tutorial for painting a Malachite Butterfly with oil paint, from start to finish.


Recent Articles
-
You Can Paint Butterfly Art!
Apr 21, 24 08:31 AM
 Unlock your creativity and start painting butterfly art. Discover the techniques of painting realistic butterflies. Link to 5 different pages on how to paint butterflies with tips and valuable insight…
 -
Learning to Paint
Mar 29, 24 12:00 PM
 Learning to paint is fun! Millions of people are painting and you can too!
Use these five easy things to jump start your painting journey.
Learning to paint is fun! Millions of people are painting and you can too!
Use these five easy things to jump start your painting journey. -
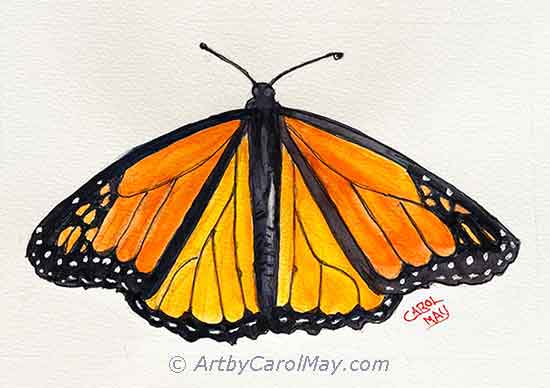
Easy Butterfly Painting: Watercolor Monarch Step-by-Step Tutorial
Mar 25, 24 03:39 PM
 Get creative with an easy butterfly painting tutorial. Discover the joy of drawing and painting a vibrant Monarch Butterfly with simple watercolor techniques.
 -
Overcoming an Artist's Block
Mar 15, 24 12:00 PM
 How to survive an artist's block. All artists can have blocks or delays, but we get over it.
What is an art block? How do we get started painting again?
How to survive an artist's block. All artists can have blocks or delays, but we get over it.
What is an art block? How do we get started painting again?
Recent Articles
-
You Can Paint Butterfly Art!
Unlock your creativity and start painting butterfly art. Discover the techniques of painting realistic butterflies. Link to 5 different pages on how to paint butterflies with tips and valuable insight… -
Learning to Paint
Learning to paint is fun! Millions of people are painting and you can too!
Use these five easy things to jump start your painting journey. -
Easy Butterfly Painting: Watercolor Monarch Step-by-Step Tutorial
Get creative with an easy butterfly painting tutorial. Discover the joy of drawing and painting a vibrant Monarch Butterfly with simple watercolor techniques. -
Overcoming an Artist's Block
How to survive an artist's block. All artists can have blocks or delays, but we get over it.
What is an art block? How do we get started painting again?