- Home
- Mixing Colors
- Mix Skin Color
Do you want to know how to mix skin color for your paintings?
We can paint our friends and family when we know how to mix skin color.
It's not hard. We can have the joy of painting portraits when we learn how to make skin colors.
All skin colors are a mixture of red, yellow, blue and white. This combination of colors will make skin colors for watercolor, oil and acrylic paintings.
 Painting skin colors
 Painting skin colors
The basics of color mixing are the same for any subject.
The trick is to get fundamentals of color into our mind. When we understand color, then we can mix the colors for landscapes, animals and people all the same.
There was a request on how to mix skin color. I thought oh my, people are not my normal subject.
The first and last time I painted people was in 1982 and '83. That was only three people paintings, ever! But, I'm up to the challenge and here's the results.
let's mix skin color and paint a portrait
Have someone who will sit to have their portrait painted or get a good, clear photograph.
It's important to do the drawing before we start painting.
This drawing was lightly put on watercolor paper with a pencil.
do an underpainting
Paint the basic values of each area of the painting before painting any colors.
Double check the drawing while doing the underpainting. Make the necessary adjustments now before starting to paint the colors.
 Underpaint the values.
- Make a violet with red and blue.
- Then add the compliment, yellow to make black or brown. If the mixture is brown, add more blue to make it black.
Look at the subject through squinted eyes of see the values.
This subject had dark hair and eyes that are the darkest values. There was a dark shadow under the chin.
- The lips were painted too dark. Don't underpaint them that dark.
The face is the lightest value. It is not underpainted, except for a small shadow on the right side by the hairline.
The values in the shirt are a thin wash of the same color mixture.
Double-check the drawing and values before we start with how to mix skin color.
Let the underpainting dry.
how to mix skin color
We make skin colors from the three primary colors.
- Yellow: Lemon or Cadmium Yellow Light
- Red: Cadmium Red
- Blue: Ultramarine Blue
This demo is watercolor. Oil color names are the same. Acrylic color names may be somewhat different. Just use a trio of the primary colors.
All ranges of skin colors can be mixed from these three colors.
 Mix the primaries to make skin colors.
Watercolors use more water and less pigment for the lighter values. The white paper shows through the color to lighten it.
Oils and acrylics will use white for the light values. But remember that white paint cools the colors.
We may want to lighten warm colors like orange or red in oils or acrylics. Try using yellow instead of white, so the color will remain warm.
All of these skin tones were mixed with varying amounts of the three colors. Even the lighter tones are a mixture of red and yellow with either a little blue or a mixed green to tone down their intensity.
mix the skin colors and paint a portrait
Let's do the hair first to frame the face. With the hair done we can turn our attention to the skin and how to mix skin color.
paint the hair
You may have noticed a variation of light and dark values in the underpainting. That's because I was deciding which way to paint the hair.
One way or other is just a matter of preference.
- One option was to paint the light values and then paint the darks over the light underpainting. That's why you see some lighter brown and grey values. Go up to the underpainting.
- The other option is what I settled on. I painted the darkest values and let them dry. Then painted the lighter values over the top of the darks.
I mixed a variation of lighter tones of brown, even some violet and blue.
Paint the light tones over the dark values. Paint loosely with abandon, not strand by strand.
Notice the light is coming from the right side. So, the hair on the left of the head is shadowed, darker.
 Complete the hair to frame the face.
paint the forehead
- Mix yellow with a tiny bit of red. The red is much stronger and it doesn't take much. Then neutralize the mixture to make it look more natural. Use either blue or a mixed green.
Prewet the forehead, so the paint will go on smoothly.
Start painting on the left shadowed side and paint lighter to toward the center. Paint the yellow down onto the nose.
- Mix a rosy tone with just a little red and speck of yellow and blue to neutralize the color. Thin the color with plenty of water.
The middle forehead is in full light. It is still damp, so the colors will blend together. Paint it with the rosy tone.
- Mix a shadow color from mostly blue with a bit of red and yellow to neutralize the color.
Paint the shadow color on the right side of the forehead. The hair is sticking out and makes a shadow on the edge of the face.
Prewet and then paint some shadow color on the nose side of the right eyebrow down to the eye. Then blend it into some rosy color under the center of the eyebrow.
Curiosity got me and I put some of the rosy tone on the right cheek to see how it looked. In the next step I put a rosy color on the other cheek too.
Learn how to paint watercolor step-by-step.
we all make mistakes
The lips were painted fairly dark in the underpainting. I supposed a glaze of red would go over the dark value.
That was a mistake. Red did not even show over the dark underpainting.
So, I did my best to remove the dark paint with a damp brush. That didn't take off hardly any paint.
Finally, I blow-dried the area. A pencil eraser removed the excess paint to an acceptable value.
 The lip value after correction.
continue painting the face
Prewet under the eyebrow and the right side of the face. Paint the rosy tone up the right side. Join it to the color on forehead.
- Darken the rosy color slightly with a speck of the underpainting color.
Prewet and paint the left side of the face blending it up into the forehead color.
Notice the highlighted area under the left eyebrow.
Start painting the left side of the nose and the neck.
paint the mouth
Mix any shade of red or pink you wish. I tried several different reds before I settled on one.
Notice the top lip will be lighter. There is a shadow under the bottom lip.
 Take a face break and paint the shirt.
paint the shirt
Ultramarine Blue is a perfect shirt color.
- Pure Ultramarine with water was used in a few areas.
- Mix the blue with a little red and yellow to make it a blue-grey.
- Darken the blue-grey with some underpainting color for the shadows.
Prewet each area of the shirt, as you get to it.
Have fun painting the shirt loosely and watching the watercolor flow.
Visit the glazing watercolor page.
painting the features
Start where ever you want. I started on the left side of the face.
 Start painting the eyes.
Complete the left eyebrow with the underpainting color.
- Mix a tiny bit of underpainting color with the rosy color. Use that color on the left side of the nose.
- Add a little more blue for a shadow color under the brow toward the nose. Touch the highlight under the brow with a bit of skin color.
- Mix a brown, blue and red with a large amount of yellow.
Paint the iris of the eye with brown, leaving a highlight.
Use the underpainting color for around the eye, a shadow under the bottom lip and inside the mouth.
finalize the details
A lot depends on our style of painting. We may want to see brush strokes and the break between different colors. This is joyful method of painting portraits with oils.
This painting is a smoother type. Look over the skin and see if the colors transition well into each other.
Does it look like a smooth child's skin?
 Check the final details
here are some of the finishing details
- Check the mouth: The bottom lip is highlighted and is shadowed underneath. The top lip has a very slight highlight in the center.
- Nose: It's lighter than the surrounding areas. The color runs smoothly into the forehead. It is shadowed on the left side. A slightly darker value goes from the tip of the nose down to the nostrils. Indicate the indentation between the nose and upper lip.
- Eyes: Complete both the eyes. The white of the left eye is slightly shadowed on the left side. The rest of the eye whites are untouched white paper.
- Chin-line: Soften the chin-line with a damp brush. Apply a dirty blue reflection from the blue shirt.
- Neck: Check the neck shadow and adjust if necessary. My underpainting was way to dark, so I removed some of the dark a damp brush. Dried the area with a blow dryer. Then prewet the area and repainted the neck.
- Ear: Hair color was accidentally painted over the ear. I removed it and painted the ear a subdued skin color.
- Check over the painting and make any adjustments you see.
what's next?
We both have experienced how to mix skin color. It was a joy sharing with you.
 Three colors made a nice portrait painting.
keep painting!
You might like these
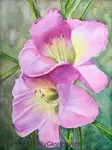
Painting Daylilies: A Watercolor Flower Tutorial
Start painting daylilies with a step-by-step watercolor tutorial by artist Carol May. Watercolor is easy to use, the perfect medium for painting pink flowers.
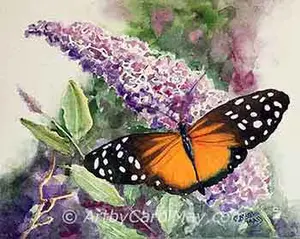
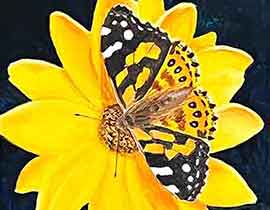
Butterfly Art: Tutorial to Paint a Realistic Butterfly
How to paint butterfly art with watercolor. A step-by-tutorial makes watercolor easy. Enjoy painting a realistic butterfly perched on a butterfly bush flower.
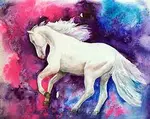
How to Paint a Horse: A dynamic white horse with watercolor
Do you want to learn how to paint a horse? An easy watercolor tutorial to create a vibrant prancing horse on a contrasting background to display the white horse
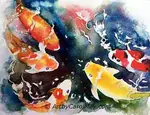
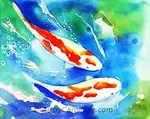
Koi Fish Painting: Pouring Watercolor is Fun!
Step into the vibrant world of Koi Fish Painting. Learn the enjoyable watercolor pouring technique and create enchanting koi art with this step-by-step tutorial
Recent Articles
-
What is the Best Painting Medium?
 What is the best painting medium for the artist to begin painting? Compare the pros and cons of today’s popular mediums, oil, watercolor, acrylic and alkyd paint. What is the difference between their…
 -
How to Get into Painting
 Do you want to know how to get into painting? What are the essential supplies to start painting? What's the best paint? What should we start painting? How do we avoid common mistakes? The step-by-step…
 -
How to Paint Watercolor Whites
 How do we paint watercolor white? Examples of popular techniques of how to paint white in our watercolor artwork. What's the easiest way to paint white in watercolor? How do we keep the paper white? I…
Recent Articles
-
What is the Best Painting Medium?
What is the best painting medium for the artist to begin painting? Compare the pros and cons of today’s popular mediums, oil, watercolor, acrylic and alkyd paint. What is the difference between their… -
How to Get into Painting
Do you want to know how to get into painting? What are the essential supplies to start painting? What's the best paint? What should we start painting? How do we avoid common mistakes? The step-by-step… -
How to Paint Watercolor Whites
How do we paint watercolor white? Examples of popular techniques of how to paint white in our watercolor artwork. What's the easiest way to paint white in watercolor? How do we keep the paper white? I…