- Home
- How to Watercolor
How to Watercolor: A Captivating Tutorial
How to Watercolor: Simple techniques create beautiful paintings.
Whether
you're a beginner or have done some painting, this
guide will take you through the techniques and skills
to increase your painting skills.
Watercolor
is a beautiful medium that allows you to create
stunning works of art with just a few simple supplies.
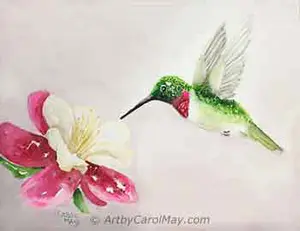
 Hummingbird on a Sticky Perch
Introduction to Watercolor
Watercolors are clean, easy and a good way to start painting. Watercolor can create wonderful effects that can't be achieved with other painting mediums.
You can confidently paint with watercolors!
- Wet the brush with clean water and dip it into a desired color. Mix the water and paint together.
- Then take the brush full of paint to the painting.
- Or take it to the palette, if we want to mix the color with more water or other colors.
- Rinse the brush before dipping it into a different color to keep the colors clean.
- Watercolor is painted from light to dark. We do this because the light watercolors are not dense enough to cover up dark colors.
Materials and Supplies
What do we use in this painting?
 Rufous Hummingbird
- Paint and a palette or plate for mixing colors
- A water container and a spritz bottle of water
- #140 watercolor paper
- #4 and #6 round brushes for the hummingbird
- #10 round brush for the sky
We will be painting the hummingbird from a photo by Diana Roberts.
The Colors We Will Be Using
The colors set the tone and mood for the entire painting.
 Choose your color scheme.
We will be using one of painting color schemes I use quite often, compliment, plus one half right.
Most paintings work the best with a pair of complimentary colors.
Mixing two compliments can provide an additional range of colors and values.
The compliments in this case are blue and orange used with the third color yellow.
- Ultramarine Blue
- Burnt Sienna
- A mid-range orange: I used two, Coral Orange and Winsor Orange
- Winsor Yellow or Cadmium Yellow Light
Drawing and Transferring the Image
The first step in how-to watercolor is to get the drawing on your painting surface. With a clear and accurate outline, you'll be ready to bring your masterpiece to life.
 Do an outline drawing.
We have several choices. Draw the image directly on the painting surface.
Or do the drawing on a separate paper and then transfer it to the painting surface.
Normally I transfer my drawings with graphite paper, but this time I tried something new for me, a light pad.
We put a drawing on the light pad with watercolor paper on top of the drawing.
Turn on the light pad and turn out the lights in the room.
Amazingly the image shows thru the thick watercolor paper.
Then we just pencil, trace the drawing onto the watercolor paper. It works great!
The HUION L4S LED Light Box A4 is light weight, about 12"x16". It is little over an inch thick with an 8"x12" working surface and it's USB powered.
It was a joy to use and I highly recommend it for any serious artist.
How to Watercolor: Create a Beautiful Painting
This step-by-step guide will walk you through the details and techniques to elevate your watercolor skills. Let's bring a beautiful hummingbird to life on paper!
Start the painting with the #6 round brush. We start the painting with the hummingbird's gorget.
 Start the throat with yellow.
Prewet the area to be painted with clean water from your brush.
Paint yellow on each side of the gorget, but not all the way into the center.
 Add orange while it's still wet.
While the yellow paint is still wet, paint orange in the center.
Let the orange flow out into the yellow. If necessary, gently dab it into the yellow.
Paint the Top of the Head
Mix a green with the Ultramarine Blue and yellow.
We use a similar technique on the top of the head. Prewet the area. Paint yellow on the right side of the head.
Paint darker green on the left side. The colors get darker on the side away from the light. Let the green and yellow flow together.
 Paint the first layer on the head and body.
Paint the Body: First Wash
Mix a neutral color with Ultramarine Blue and orange. Prewet the body area, except the top of the shoulder. The top of the shoulder is a highlight without any shadows.
Start painting on the left and add more water to thin the color towards the right side.
Refer to the photo to see the shadow areas.
Note; we normally paint watercolor light to dark. However, Burnt Sienna picks up and moves when we try to paint other colors over it. It is the main color on the bird, so we are painting the darks first.
When the Paint Gets in the Wrong Place!
We can fix it.
 Correcting a mistake
Some of the dark body color got out into what will be the sky color. I didn't want it there.
So, I dipped a flat brush into water and blotted the extra water on a rag. We don't want the brush too wet or it will make the paint flow farther out into the unwanted area.
Stroke the damp brush on the paint to remove it. One stroke, rinse and blot the brush. Then stroke again to take more paint off. Repeat as necessary.
This works pretty well when the paint is fresh. If the paint has completely dried, it may not come off completely.
Paint the Beak and Eye
Mix a black with Ultramarine Blue and Burnt Sienna.
Switch to the #4 round brush. Paint a black strip down the center of the beak. Leave a highlight area on the top of the beak. Leave an unpainted area on the underside of the beak.
Use the same color to paint the eye. Leave at least one spot unpainted for the eye highlight. Leave the top part of the eye unpainted. Later we will paint it blue for the sky reflection.
Leave the white spot behind the eye unpainted. Most all hummingbirds have a white spot behind their eyes.
 Paint the beak and eye while the body is drying.
Continue Painting the Body
Change back to the larger #6 brush. We always use the largest brush possible. It keeps us from getting fussy and picky with our paintings.
Paint the back of the head with a medium orange.
After the body is dry, paint over it again. This time use the medium orange on the right side toward the light. Paint Burnt Sienna on the left side away from the light.
See how the sienna over the bluish underpainting mixes to make brown tones.
Let's Work on the Gorget Some More
When we go up to look at the hummer's photo, we can see the edges of some of the feathers on his throat.
 Indicate some feather separations.
So, depending on how realistic we want to paint, we may indicate a few individual feathers.
Mix a brown-orange with plenty of water. Rinse and blot the excess water out of the brush. Pick up a little color and paint the curved edges of some feathers.
Intensify the Body Colors
Gently glaze additional colors on the body. Watercolor is painted layer upon layer.
 Beef up the colors on the body by glazing.
Remember the light is coming from the right. So, the colors will be lighter on the right and darker on the left. But there is some reflected light on the left edge of the belly.
The dark shadow under the tail is a mixture of Burnt Sienna and Ultramarine Blue.
Visit the glazing watercolor page.
Complete the Hummingbird's Head
Add more vibrancy to the painting by intensifying the colors on the hummer's head.
- Use the same colors as before, just mix with less water.
- Do not prewet the area to be painted.
- Brush the colors on with a light touch, so the underneath colors are not picked up and moved around.
The feather edges will be softened when we paint across them.
If we want
definite feather edges showing, do it the other way around. Intensify
the colors, let them dry and then paint the feather edges. That's how to watercolor.
 Finish the hummer's head.
Finish painting the beak by putting a softened orange on the underside. The orange color from the bird is reflecting up onto the bottom of the beak.
Finish painting the eye with a muted blue on the top part of the eyeball. Be sure and leave the white spot behind the eye.
Painting the Background
A
well-executed background adds
depth and dimension to your subject. The natural surroundings will
complement your hummingbird creation.
Paint the Sky
Mix the Ultramarine Blue with a bit of orange to dull the blue.
 Paint the sky around the bird and branches.
Prewet the sky area, leaving the branches dry.
Normally the sky is darker at the top and it gets lighter toward the horizon.
I don't know why this photo looks the other way around?
But once I paint past it, I can't go back for another photo.
Possibly because the window behind the painting put more light on the top part of the painting?
So, paint the sky slightly darker at the top of the painting. That's how to watercolor a sky, correctly.
Start Painting the Branches
The bird is almost done, so let's do the branches.
 Have fun painting the branches.
After concentrating on painting the hummingbird, it's time to have some fun. Let's just relax and let the paint do its own thing on the branches. That's the joy of how to watercolor.
It's good to repeat colors in a painting to create unity. There is green on the hummer's head, so put some green in a few places on the branches.
- Prepare several colors; yellow, orange, sienna, blue and mix a green.
- Lightly prewet a branch area.
- Don't look at the photo; use your artist's inner voice.
- Use fairly thick colors for a one-time application. Lighter colors on the top and shadow colors on the underside.
- Change colors thru-out the length of a branch.
- Vary the colors from branch to branch.
- Let your artistic license flow and have fun!
Time for the Sticky Thorns
Paint the thorns after the branch color has set just a bit, but is not dry.
 Paint the thorns and a shadow under the bird.
Vary the colors on the thorns. Put a highlight side on some thorns. A few will be peaking from the back side of a branch.
Shadow the branch under the hummingbird.
Notice the horizontal branch is a bit muted and has soft edges. Those two things move it back behind the other branches.
Pull a damp brush along the length of each branch to soften most of their edges. We can leave an occasional hard edge, but too many hard edges would take the attention away from the hummingbird.
Final Touches
Just a few small details to go and your watercolor masterpiece will be complete.
 Finishing the details
- Pull out the little white feathers on the right side of the bird's chest. After the painting is totally dry, scratch them out with the point of a small knife. Where they emerge from the body, soften them with a damp brush. Only their tip ends have hard edges.
- Do the same with the white feathers on the bird's bottom. Shadow most of them. Leave just a few with white highlights.
- If you wish, scratch out some of the white feathers that lap over the top of his orange chest.
- The long tail feather is in front of the branch. Don't miss a second tail feather that laps in front of the branch.
- The chest colors are smoothed out with a damp brush and a little more paint.
Congratulations!
You've learned everything from the materials and techniques for how to watercolor a captivating hummingbird scene.
Continue to refine your watercolor skills with practice.
Check out the website further for additional resources and tutorials.
Let Your Creativity Soar!
More Pages to Enjoy
Watercolor for Beginners: Paint Your Dreams
Watercolor for beginners: transform your dreams into reality with our comprehensive resource to empower you as you enter the captivating world of watercolor.
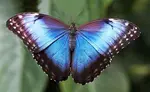
Types of Butterflies You May See in Your Yard
What types of butterflies do you see around your home? Identify 30 common butterflies in the United States. Moths vs butterflies - photos for your next painting.
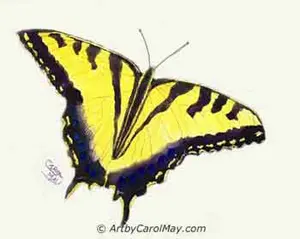
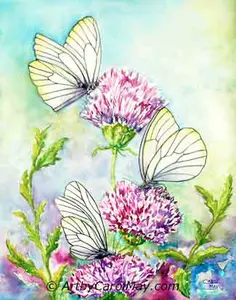
Paint a Butterfly: 5 Easy Steps + Watercolor & Oil Tutorials
Learn how to paint a butterfly in 5 easy steps, then choose a watercolor or oil butterfly tutorial that fits your style and skill level to paint with the steps.
Painting Mixed Media Creates Awesome Art!
Feel the joy and freedom of painting mixed media. Create awesome paintings with this easy painting technique of mixing acrylic and watercolor paint mediums.

Recent Articles
-
Find Your Art Style
Apr 24, 26 01:00 PM
 Finding your style isn’t about picking a label or copying someone else. It’s about noticing what you’re drawn to - and repeating a few things long enough that your choices become consistent. Go from l…
 -
Create Your Own Art!
Apr 14, 26 01:16 PM
 If you have been following the step-by-step lessons and you are ready for the next step. Begin creating your own paintings with confidence. Learn how to plan a painting, solve common painting problems…
 -
Improve Your Art!
Mar 20, 26 12:00 PM
 Painting daily will put your art into overdrive! There is a current craze among the art community to complete a small painting every day. Regular painting is the best way to learn how to paint! You do…