- Home
- Paint a Wave
How to Paint a Wave: A Step-by-Step Oil Painting Tutorial
Learn how to paint a wave with five easy steps. Painting waves is easy.
Just follow the steps and you will be amazed what you can do!
When we go to the ocean, there is nothing as awesome as the ocean. The crashing waves are
mesmerizing
and they are a wonderful subject for painting.
If you’re not confident choosing colors for your waves yet, you might like to start with my How to Paint Ocean Colors lesson. It shows how different light and weather affect ocean colors, and includes a full step-by-step painting.
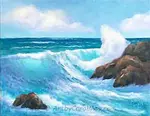
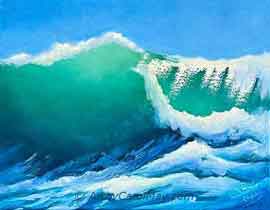
 Paint this wave step-by-step.
What Makes a Wave?
We have a better idea of how to paint a wave, when we know how waves are made.
Out in the ocean, energy movement under the surface of the water makes the waves. The energy is the result of winds and currents.
This energy under
the water causes the waves to go up and down.
The top of the water stays basically in the same place. This is why a surfer can sit out on the ocean in the same place going up and down on the waves until he decides to catch a big one.
- The front of the waves are concave.
- The back of waves are rounded.
- The base of the waves is level.
No matter how windy it is or how rough the sea is, the baseline of the waves remains level with the horizon.
 Waves are awesome!
How Do Waves Form?
When waves approach the shore, they appear to be growing.
Actually they are the same size. They just rise up taller because the ocean bottom is closer to the surface. So the volume of water in a wave has less space.
As a wave builds higher, more water is sucked into the wave. The front of the wave becomes more concave and creates a trough in front of the wave.
When a wave gets so large it can no longer support itself, it falls forward.
Understanding how waves form helps us learn how to paint a wave. Waves make the awesome subject of seascape paintings.
Painting Seascapes Takes Practice ......
Practice, practice and more practice is what makes a painter. And it makes painting fun!
Here are a couple of shots from Pixabay.
 Transparent Wave
 Breaking Wave
We can take any part of a reference photo and do a practice painting.

What Do We Need to Paint an Ocean Wave?
We will be doing this wave painting with oil paints. You could use much the same methods for acrylics. Oil Painting Supplies
Paint Colors:
- Blue - Ultramarine Blue or Thalo Blue
- Green - Viridian Green or Thalo Green
- Yellow - Cad. Yellow Light or Naples Yellow
- Orange - Burnt Sienna
- White - Titanium White
- Optional - Alizarin Crimson
Brushes:
Hog hair bristle brushes are great for seascapes.
You may use synthetic brushes of your choice. However sable or other soft brushes normally are not suitable for seascapes.
Canvas:
Stretched canvas is the traditional choice for seascapes. Canvas boards are good for practicing how to paint a wave.
How to Paint a Wave
- Draw the large shapes.
- Outline the areas of foam and the shape of the wave.
- Also outline the eye of the wave and where the wave spills over.
Normally I outline a painting on the canvas with a pencil or thinned yellow paint. This time I used Ultramarine Blue, so it would show up in the photograph.
 Do an outline drawing on the canvas.
Step 1 - Paint the Wave with the Spill-over
Mix blue and green together and brush it onto the face of the wave.
Use scrubbing strokes to scrub the paint on. Paint thinner and lighter toward the eye of the wave.
- Don't paint the foam and the eye, yet.
- Paint the reverse on the spill-over area.
The water gets thinner as it falls down the spill-over, so the paint will be lighter toward the bottom of the spill-over.
 Paint the face of the wave.
Paint Yellow Starting at the Top of the Eye
As you paint down the eye blend the yellow into the green. Blend them together so there is no definite line between the two colors.
- Paint yellow on the bottom part of the spill-over area.
- Blend the yellow up into the green at the top of the spill-over.
 Blend the colors with a clean, dry brush.
Paint the Base of the Wave in Shadow
Mix a dark color with Burnt Sienna and blue. More blue will make a very dark color. More Burnt Sienna will make the mixture warmer.
- Paint the dark color into the base of the wave.
- Blend the dark up into the green.
- The base of the wave will always be horizontal.
It's easy learning how to paint a wave!
 Paint the base of the wave.
Step 2 - Paint the Foreground and Background
- Continue painting the same dark colors down below the base of the wave.
- The paint will get lighter, as you come forward away from the shadow area.
- Use a variation of the same colors for the background water behind the wave.
Apply the paint to the background with horizontal strokes to indicate distant swells.
You may choose to paint sky instead of water. It's your choice.
 Paint the area in front of the wave.
Step 3 - Paint the Shadowed Foam and Foam Trails
Paint the shadow areas of the foam rolls with a bit of blue mixed with white.
You may grey the blue with a touch of Burnt Sienna. Or add a tiny bit of Alizarin Crimson for purple shadows. It's the artist's choice how to paint a wave.
- Leave the top of the foam unpainted.
- Use the shadow color to paint foam trails up the face of the wave.
- Paint some choppy water in the foreground.
 Paint the foam shadows and foam trails
Step 4 - Paint Sunlight on the Foam
Paint the Top Edge of the Spill-over Area
Mix a little yellow and white for the sunlight areas of the foam. Load your brush with the sunlight mixture. (Sorry I was trying to show you the loaded brush and the camera focused on the wave.)
- Pull a few strokes of the warm white down over the spill-over area.
- Touch the loaded brush to the top or the spill-over and pull it down very lightly.
- Pull in the direction of the foam movement.
 Paint foam on the top of the spill-over
Paint the Top of the Foam Rolls with the Sunlight Color
Use a clean, dry brush to make a few flicks up, as if the wind is catching the foam.
When you are learning how to paint a wave, use your brush strokes to indicate water movement.
Ex. The foam trails go up the wave at an angle to show the movement of the wave.
 Paint the sunlit foam.
Step 5 - Detail and Finish
Softly Blend the Sunlight Foam into the Foam Shadows
- Still using the shadow color, you may add more chop to the forward water.
- If you wish, paint more foam trails up the face of the wave with the shadow color.
- Let the foam trails softly blend into the wave colors. Gently soften the edges of the foam rolls.
This is how to paint a wave that looks more natural.
 Paint the foam trails and choppy water foam.
Use Your Sunlight Color to Highlight a Few Areas on the Water in Front of the Wave
- Touch a few sun highlights on the background water.
- Add a few dark shadow areas under the bottom edge of the foam curls.
Look over the painting and make any other adjustments you desire. You are the artist, adjust whatever looks good to you. Listen to your inner voice. Contrasting values make this a successful painting.
My desire was to extend the spill-over, adjust some of the foam trails and a few colors.
 Five easy steps to paint a transparent wave
That's It - How to Paint a Wave with 5 Easy Steps
- Paint the wave and spill-over.
- Paint the foreground and background.
- Paint the shadow colored foams.
- Paint the sunlight foams
- Detail and finish the painting.
Practice and Enjoy Painting the Ocean!
You Might Like These
How to Paint Ocean with a Step-by-Step Tutorial
Learn how to paint ocean with a step-by-step tutorial. Just follow the simple steps to create your own seascape paintings. Then enjoy the ocean at home anytime.
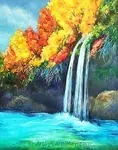
Paint a Waterfall with Beauty and Drama
Paint a waterfall to add beauty, drama and mystery to our landscape paintings. Add a waterfall to any of your oil paintings, only 3 steps with full instructions
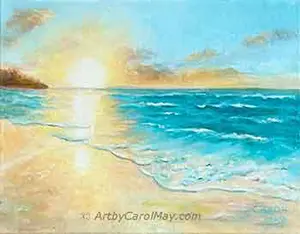
How to Paint a Beach: Step-by-Step Painting Tutorial
Uncover the secrets on how to paint a beach with a comprehensive guide on creating stunning beach art. Steps on how to paint from the sky to the beach foam.
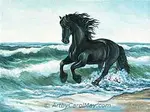
How to Do Oil Painting: Tutorial of A Horse & Ocean
How to do oil painting: This step-by-step guide helps intermediate artists create stunning artwork of a horse, from start to finishing details, artist Carol May
Recent Articles
-
Fix Common Mistakes
May 01, 26 01:00 PM
 Every artist encounters common painting mistakes. There are times when a painting just does not seem to work. Most often it's a design issue. The problems come back to composition, focal point, and va…
 -
Find Your Art Style
Apr 24, 26 01:00 PM
 Finding your style isn’t about picking a label or copying someone else. It’s about noticing what you’re drawn to - and repeating a few things long enough that your choices become consistent. Go from l…
 -
Create Your Own Art!
Apr 14, 26 01:16 PM
 If you have been following the step-by-step lessons and you are ready for the next step. Begin creating your own paintings with confidence. Learn how to plan a painting, solve common painting problems…