- Home
- Paint a Butterfly
- Painting Butterflies
Painting Butterflies in a Composition
Enjoy painting butterflies with a step-by-step watercolor tutorial.
These beautiful white butterflies with prominent black veins are residents in the United Kingdom. Their name denotes their appearance, Black-veined White Butterflies.
Several of them made a nice composition with purple thistle flowers.
This butterflies-and-flowers lesson is one part of my butterfly tutorial collection. See Paint a Butterfly for more butterfly painting projects.
 Black-veined Butterflies
 Black-veined Butterflies
Painting Your Butterflies
Get Ready for Painting
Get your supplies ready and transfer a drawing to your painting surface.
What Do You Paint Watercolor On?
Watercolor may be done on watercolor paper, watercolor canvas or Aquabord.
This butterfly painting is on Aquabord made by Ampersand.
What Colors Will You Use?
 Artist's brushes
- New Gamboge Yellow (use any warm yellow)
- Phthalocyanine Blue (called Phthalo Blue for short)
- Quinacridone Violet (a red violet)
- Dioxazine Purple / Ultramarine Violet (a blue violet)
Brushes: 2 small rounds, extended needle-point brush, 1/2" angle, and 1 1/2" wash brush (not in the photo)
Draw the Butterflies
These are the reference photos I used. You don't have to use my composition; you certainly can design your own. Refer to the composition page for tips.
 Black-veined White Butterflies
 Black-veined White Butterfly
 Apply masking fluid
Lightly pencil a drawing on the painting surface.
Apply art masking fluid around the butterflies to keep them white.
Also, put some masking on the flowers and leaves in places for highlights.
Use a separate brush for the masking fluid.
Don't use your watercolor brushes for applying the masking fluid (frisket). If it stays in the brush very long, it is very hard to get out.
After applying the frisket, wash the brush thoroughly with some dish detergent.
Start with the Background
After the frisket is dry - paint in the background around the butterflies and flowers.
Start with Phthalo Blue and a soft wash brush in the upper left corner.
The background gets lighter to the right-side and down the painting. You may add a bit of yellow on the right side for the warmth.
About half-way down start adding in some of the flower colors for variety and unity. Darken the values at the bottom to help ground the painting.
 Wash brush for the larger spaces
Start the background darker at the top using Phthalo Blue and paint lighter going down.
 Smaller brush for tight spaces
Use a smaller brush and a variety of colors coordinating with the flower colors toward the bottom.
Painting the Flowers
Paint the flowers before the bodies and legs of the butterflies because they sit on the flowers.
 Paint warm and cool violets.
Use a small round brush to roughly lay in the flower colors.
Use the warm, reddish violet on the top of the flower that receives more light.
Use the blue-violet away from the light.
Vary the intensity of the colors by using more or less water.
Let the colors flow together.
The green color in the flower is the masking fluid showing.
 Remove masking - paint more petals.
After the flower color is dry, remove the masking fluid from the flower.
Now paint some individual petals with a small round brush.
Use variations of light and dark violets.
Leave white spaces for highlights and sparkle.
There are additional ways to save the white of the watercolor paper.
The Green Flower Parts
 Paint the green flower parts.
Paint the calyx, sepals and stems of the flowers.
Mix your greens from blue and yellow and use purple to dull the greens when desired.
Mix a lighter green for the side toward the light - add more yellow.
Away from the light darken the green by adding more blue.
If your green color looks too garish - add a bit of violet to dull it down.
The Leaves
You may want to paint the leaves with more or less detail.
 Paint the leaves with variety
It's up to the artist's individual preference.
After all the details on the butterflies and flowers, the leaves give the eye a more restful place.
Mix dark and light greens the way you did for the green parts of the flowers.
The same as above - paint the leaves with a variety of greens. The leaves toward the light will have more yellow.
The shadow side of the leaves and stems are a darker, duller green.
Now We Get to Paint the Butterflies!
First remove the masking.
First make sure all the paint around the butterfly wings is completely dry.
Then remove the masking from their wings.
The masking is rubber cement and it comes off pretty easy.
You may use a dry finger to rub it off.
Or use a Pick-Up Rubber Cement Eraser, as shown in the photo.
 Remove the masking
Butterfly Wings
 Shade the wings
Shade the butterfly's wings before painting the veins.
Mix yellow and violet to make a gray.
(Sorry - I turned the painting upside-down to make it easier to paint the overlapping wing.)
Put yellow on the top outer edges of the wings.
Keep in mind that butterflies have four wings. Paint the gray where the wings attach to the body and where they overlap.
The warm yellow brings the wing forward from the gray on the wing behind it.
Paint the Veins
Mix a black by using yellow, blue-violet and blue for painting the veins.
You may use any small round brush, a liner, or a needle-point brush for the veins.
I was anxious to paint the veins (first photo). I forgot about shading and didn't use a good brush for me. So, some of the veins were too thick.
To correct the mistake, I used a damp brush (flat angle) to pick up the extra paint before it dried.
 Painting the first butterfly's veins with a round brush; they got too thick.
On the first butterfly, I forgot to do shading before the veins. After the veins dried, I went back and shaded.
 The next one, I switched to a needle-point brush, so much better.
Painting involves learning as we go. This butterfly got shaded before painting the veins - so much easier.
Paint the Butterfly Bodies
 Paint the butterfly's body
Butterflies have three body parts.
They have a head with two antennae, a thorax with six legs and four wings attached to the thorax and an abdomen.
Lighten the same color you mixed for the veins with a bit more water.
The body will be lighter toward the light source.
The butterfly's legs go out over the flower petals because the butterfly is standing on the flower.
Final Adjustments
 Complete Your Painting
Look around your butterfly painting and see what you might want to touch up.
Value contrast is what really make a painting sparkle!
You may add more darks at this time, if you feel the painting needs it.
Do it whatever suits your taste. You have an artist's license for painting butterflies.
No
two paintings will ever look the same. Each painting is an individual.
Every individual artist will do their paintings in their own style.
Butterflies Are a Joy to Paint!
Looking for more ways to paint butterflies? Visit Paint a Butterfly to see the full butterfly tutorial collection.
Paint More Wonderful Gifts from God
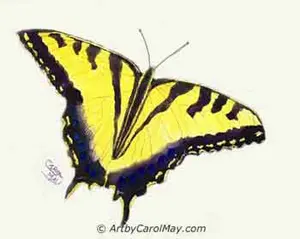
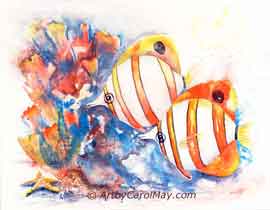
Paint a Butterfly: 5 Easy Steps + Watercolor & Oil Tutorials
Learn how to paint a butterfly in 5 easy steps, then choose a watercolor or oil butterfly tutorial that fits your style and skill level to paint with the steps.
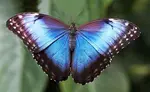
Types of Butterflies You May See in Your Yard
What types of butterflies do you see around your home? Identify 30 common butterflies in the United States. Moths vs butterflies - photos for your next painting.
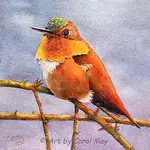
Painting Mixed Media Creates Awesome Art!
Feel the joy and freedom of painting mixed media. Create awesome paintings with this easy painting technique of mixing acrylic and watercolor paint mediums.
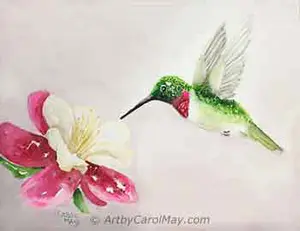
How to Watercolor: Paint a Beautiful Hummingbird
How to watercolor like a pro! This captivating tutorial guides you through every step, from choosing materials to painting a breathtaking hummingbird scene.

Recent Articles
-
Fix Common Mistakes
May 01, 26 01:00 PM
 Every artist encounters common painting mistakes. There are times when a painting just does not seem to work. Most often it's a design issue. The problems come back to composition, focal point, and va…
 -
Find Your Art Style
Apr 24, 26 01:00 PM
 Finding your style isn’t about picking a label or copying someone else. It’s about noticing what you’re drawn to - and repeating a few things long enough that your choices become consistent. Go from l…
 -
Create Your Own Art!
Apr 14, 26 01:16 PM
 If you have been following the step-by-step lessons and you are ready for the next step. Begin creating your own paintings with confidence. Learn how to plan a painting, solve common painting problems…