- Home
- Paint Ocean
How to Paint Ocean with a Step-by-Step Tutorial
You want to know how to paint ocean.
Enjoying the ocean and the salt air can be a mesmerizing experience. Let's translate our ocean experiences to the artist's canvas.
This oil painting tutorial starts with the sky, then the background water, the crashing wave, rocks and beautiful foam trails complete the seascape painting.
 Painting the ocean with oils.
 Painting the ocean with oils.
Learn to Paint the Ocean Path
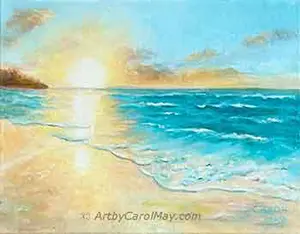
Step 1 – Practice Simple Shorelines
Start with a calmer, simpler scene to practice horizons, sand, and gentle water. How to Paint a Beach
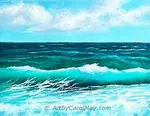
Step 2 – Focus on Waves and Water Movement
Go deeper into the structure and movement of waves so they look more realistic and less “stiff.” How to Paint a Wave
Step 3 – Understand Ocean Colors and Light
Learn how different
weather and light affect the colors of the sea, and follow
a step-by-step color-focused painting. How to Paint Ocean Colors
Step 4 - Paint an Entire Ocean Scene (This Page)
Paint the lazy clouds in a sunny sky and the ocean crashing against the shoreline rocks.
Step 5 – Add Details to Your Seascapes (Coming Soon)
I’m working on new lessons for beach pebbles/rocks, clouds, and stormy waves that you can add to your ocean scenes.
What Does the Ocean Look Like?
Many of us have been to the ocean and have seen its beauty and wonder. Let's look at the ocean closely and see what we can learn about how to paint ocean.
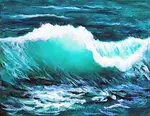
Let's look at an ocean photo to see what we can learn.
 The beautiful ocean
The distant water is very dark blue.
As we come toward the shore, the water starts to turn to a teal color. Closer to the shore the water is shallower and it turns green. When a wave rises up, it is a lighter yet because the light is passing thru the wave.
Horizontal water reflects the sky color.
The water in front of the wave is a lighter blue. This water is transparent. The blue is neutralized by the sand color seen thru the transparent water.
The base of the wave is dark.
It is thicker and it is in shadow. You can see the dark base in the center of the wave where it is cresting. Also, notice the dark shadows under the foam capping over the top of the wave.
Determine the light direction.
The light direction affects our entire painting. See the glints
of light on the right side of the ocean and the highlights on the right
side of the clouds. So, we know the light is coming from the right.
When we are learning how to paint ocean, we will use this knowledge. Learn more about ocean waves.
Let's Do an Ocean Painting
Taking what we have learned, we will do a basic seascape painting that includes a foam burst.
What Do We Use for This Painting?
- Any warm yellow - Cadmium Yellow light is good.
- Burnt Sienna
- Alizarin Crimson
- Blue - Ultramarine or Phthalo Blue
- Green - Phthalo Green or Viridian
- Titanium White
This painting was painted on 11x14 gallery wrap canvas with hog hair bristle brushes (#4, #8 flats) and Gamsol odorless mineral spirits (for thinning and cleaning). See my tips on How to Start a Painting
How to Paint Ocean
- Do some thumbnail size sketches about the size of a postcard to figure out your composition, values and how to paint ocean.
- When you have it figured out then, sketch the composition on the canvas with either a pencil or thinned paint.
- Normally I use thinned yellow paint because it is easy to paint over. This time I used Ultramarine Blue, so it would show up better in the photograph.
 Sketch a line drawing on your canvas
Block-in the Colors
Block-in a thin layer of paint that covers the canvas with the basic color of each item.
We will be blending the colors later or adding other colors on top of the blocked-in colors.
The first layer of paint needs to be thinned with your solvent. If the first blocked-in paint is too thick, it will just make a mess later when we paint over it.
Block-in the Background Water
Mix your blue and green for a dark color to start painting at the horizon.
Use more green as you come forward. Add a bit of white as you come forward more.
Put a few streaks of darker green on the light green areas to indicate shadowed water.
 Paint the background water with the ocean colors
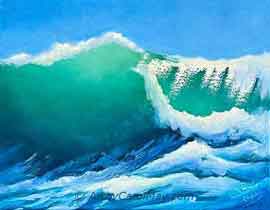
Block-in the Wave
The wave will be darker at the base because the base is the thickest part of the wave.
Gradually lighten the wave towards the top by adding more white or a pale yellow.
Paint the spill-over with a lighter green because it is not very thick at all.
Painting a transparent wave is the foundation of most all ocean paintings.
 Use the same colors to block-in the wave
Paint the Sky
Use less solvent than when blocking-in. The paint will cover the canvas.
Mix your blue with white. If it looks too blue add a tiny touch of Burnt Sienna to tone it down.
The light is coming from the left, so the sky is lighter on the left and darkens slightly to the right.
The sky gets lighter toward the horizon. As you paint down to the horizon, add some white. Warm up the blue with a bit of green toward the horizon.
 Paint a sunny day sky
Paint the Cloud and Foam Shadows
Mix a bit of blue and Alizarin with white for the shadow colors on the clouds and foam. If you prefer grey shadows, mix Ultramarine with Burnt Sienna and white.
Horizontal water reflects the sky colors. So, paint the sky blue colors on the water in front of the wave.
When you are learning how to paint ocean, use your artistic license. Mix in some of the ocean colors for variety.
 Block-in the shadow colors and horizontal water
Continue Blocking-in: The Rocks
Mix Burnt Sienna with your blue for the brown rock colors.
More blue makes the mix darker. Mix the color lighter or darker by varying the amount of blue. Learn more about Mixing Paint Colors
The rocks will normally be darker down by the water where the get wet.
To help get the shape of the rocks, think of the rocks as a box with a top and sides.
 Paint the rocks darker by the waterline.
Paint Your Sunlight Colors
Mix a little yellow with white for your sunlight color.
Paint it where the sunlight would be striking. (The sun is coming from the left.)
The sun would be hitting the top of the clouds, the top of the foam areas and also some of the wavelets in the foreground water.
When you are learning to paint ocean always pay attention to the direction of the light; that gives reality to the painting.
 Block-in the sunlight on the foam.
Refine the Painting
- The entire canvas has been covered with the local colors of each item.
- Now we will refine and detail the painting.
Blend the Shadow and Sunlight Colors
- Using a clean, dry brush softly blend the sunlight and shadow colors together in the clouds and foam.
- There will be a soft line between the shadows and the highlights, no hard lines.
- Note: Also, blend the edges of the clouds softly into the sky color.
When we paint the ocean, there will be no hard lines because everything is moving.
 Blend the sun and shadow colors on the foam.
Paint the Background Waves
Use the sky color and pull your brush horizontally across the background water for the front edge of a few small waves.
When we are learning how to paint ocean, remember the waves look smaller and closer together in the distance.
On some of the closer waves, put sunlight color on in a few places and darker water in front of them for their shadows.
 Paint the small background waves.
Highlight the Rocks
Highlight the rocks with a mixture of Burnt Sienna mixed with either yellow or white or both.
The highlights in the shadow areas will be greyed by adding blue to the mixture.
- Some of the shadowed areas may be very dark.
- Splash a bit of shadowed foam against the base of the rocks.
- Soften some of the edges where the water hits to rocks.
 Highlight the rocks.
Paint Foam Patterns on the Wave
- Refine the foam patterns on the wave using the lavender or grey shadow color of your choice of color.
- Highlight the foam patterns with sunlight in a few places.
- Use a medium water color to paint a shadow under the foam cap that is spilling over the top of the transparent wave.
 Paint foam patterns on the cresting wave.
You Can Paint the Ocean
The ocean is one of my favorite creations and it's a fun challenge to paint.
Painting anything takes practice. The more you paint, the better your paintings will be.
Don't try to be perfect. Just paint and enjoy learning.
 Look for any final adjustments
Frequently Asked Questions
Let's dispel a few common questions about painting ocean seascapes.
What Colors Do I Need to Paint the Ocean?

It's easy to paint any ocean scene with 5 single-pigment colors:
- Cadmium Yellow (any cadmium yellow)
- Burnt Sienna (an earthy orange)
- Alizarin Crimson (a transparent red)
- Ultramarine Blue* (most used for ocean)
- Viridian Green (a single-pigment green)
*Alternately you may use Phthalo Blue and Phthalo Green. The Phthalocyanine (Phthalo for short) colors are modern single-pigment colors that are extremely strong. Their strength makes them hard to handle, so they are not recommended for beginners.
Where Do I Put the Horizon - How Much Sky and Water?
Where Do I Put the Horizon - How Much Sky and Water?
Place the horizon line above the center of canvas. Since our subject is the ocean, there should be more water than sky.
Get more good tips on creating a good composition in paintings.
Why Does My Horizon Look Off or Crooked?
Why Does My Horizon Look Off or Crooked?
That can happen to all of us, especially on larger paintings. Measure down from the top to the proposed horizon on each side of the canvas. Then draw a straight, level horizon line with a yard stick and paint to it.
Why Do My Water Colors Look Muddy?
Why Do My Water Colors Look Muddy?
Muddy colors are often caused by mixing more than two color pigments together. Multi-pigment colors, ex. Sap Green make muddy mixtures. It's best to use single-pigment colors. See my list of common warm and cool single-pigment colors.
How Do I Paint the Water That Looks Like It's Moving?
How Do I Paint the Water That Looks Like It's Moving?
Two things make the water move: First - stroke the paint on in the direction of the moving water. Second - Soften the edges. When things are moving, they have blurry edges, not hard edges.
What Brushes Are Good for Painting Waves and Foam?
What Brushes Are Good for Painting Waves and Foam?
My preference is natural hog hair brushes. Their stiffness makes it easier to create billowing foam and waves. A brush that bends when you apply the paint allows it to mix with the adjoining colors, thus losing the painterly effect.
Painting Seascapes Is Awesome!
More Pages to Enjoy
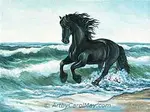
How to Do Oil Painting: Tutorial of A Horse & Ocean
How to do oil painting: This step-by-step guide helps intermediate artists create stunning artwork of a horse, from start to finishing details, artist Carol May
How to Paint Ocean Colors: Palette, Mixing & Tutorial
How to paint ocean colors beautifully? Get inspired with creative tips and guidance in a tutorial to master the art of capturing the ocean's stunning hues!
How to Paint a Beach: Step-by-Step Painting Tutorial
Uncover the secrets on how to paint a beach with a comprehensive guide on creating stunning beach art. Steps on how to paint from the sky to the beach foam.
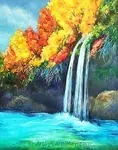
Paint a Waterfall with Beauty and Drama
Paint a waterfall to add beauty, drama and mystery to our landscape paintings. Add a waterfall to any of your oil paintings, only 3 steps with full instructions
Recent Articles
-
Fix Common Mistakes
May 01, 26 01:00 PM
 Every artist encounters common painting mistakes. There are times when a painting just does not seem to work. Most often it's a design issue. The problems come back to composition, focal point, and va…
 -
Find Your Art Style
Apr 24, 26 01:00 PM
 Finding your style isn’t about picking a label or copying someone else. It’s about noticing what you’re drawn to - and repeating a few things long enough that your choices become consistent. Go from l…
 -
Create Your Own Art!
Apr 14, 26 01:16 PM
 If you have been following the step-by-step lessons and you are ready for the next step. Begin creating your own paintings with confidence. Learn how to plan a painting, solve common painting problems…