- Home
- Realistic Butterfly
Butterfly Art: A Watercolor Butterfly Tutorial
Do you want to know how to paint butterfly art with watercolor?
Watercolor gives us the option of expressing ourself with either loose imagery or more detailed realism. This butterfly tutorial contains a combination of both.
Combine your passion for learning to paint with the beauty of butterflies.
 You can paint a butterfly!
 You can paint a butterfly!
How to Paint Butterfly Art with Watercolor
Watercolor is a lovely painting medium. My first art lessons were with oils, but it was hard for me to paint fine details.
Then I found watercolor and started painting butterflies. Enjoy painting this lovely butterfly step-by-step.
Materials and Sketch
We are going to be painting on my favorite watercolor support Aquabord, an 8"x10".
|
BRUSHES:
|
COLORS:
|
The three colors, orange, green and violet are equally spaced around the color wheel. That's what is known as a triad color scheme. The triad scheme always creates a balance of colors.
You may want to use a different color scheme.
Sketch the Butterfly
For the composition I placed the butterfly to the right of center, facing into the painting.
Refer up to the finished painting and lightly sketch the long-wing butterfly with the Butterfly Bush flower, stem and leaves on your painting surface.
How to Paint White with Watercolor
Watercolor paintings most often use the paper as the white color.
In this painting we will use two common methods of preserving the white paper.
1. Apply Masking Fluid

Apply masking fluid to areas on the flower and leaves.
Let it dry before painting. It takes about 30 minutes to dry.
You may speed the drying with a hair dryer. Don't get it too hot or it will not be removable later.
2. Paint Around the White

Leave some areas of the paper white by painting around those areas.
This creates the brightest whites.
There are more techniques for preserving the white watercolor paper.
Painting the Butterfly
 Add brown, then orange closer to the body.
Mix a dark color with Viridian and Dioxazine Violet and paint around the white spots on the butterfly's wings.
Add orange to warm the mixture and make it brown for the areas closer to the body.
Use less water to make the darker colors.
And obviously more water makes lighter colors. That's an important key of how to paint with watercolor.
When you near the butterfly's body start adding orange.
Blend the orange into the brown.
 Continue painting the butterfly wings.
When we are painting butterfly art, note just a bit of butterfly anatomy. Butterflies have four wings and six legs.
The wings and legs are attached to the thorax, the fat part of the body behind the head.
You can faintly see the division between the fore-wing and the hind-wing going at an angle up to the thorax.
Paint the dark border on the hind-wing.
Feather the colors together by running a clean damp brush along the juncture of the dark and orange.
The water is the important part of learning how to use watercolor.
 Paint the body with some highlights.
Using more water produces lighter colors.
If necessary, darken the areas around the white spots. Adjust the shape of the white spots where needed.
Now turn your attention to the butterfly's body.
Paint the left, shadow side dark. Lighten the value toward the light and leave a few highlights for interest.
The body is partially covered by the edges of the hind-wings. The tail end of the body peaks out behind the wings.
 Paint the veins on the wings.
Add a few dark veins to the fore-wings with brown.
Lightly suggest veins in the hind wings.
We will paint the butterfly head and antenna after the flower is painted.
Look over your butterfly. Is there enough contrast between the white spots and their surrounding black?
Does the orange color transition smoothly into the brown?
When you are satisfied with the butterfly, move on to the flower and foliage.
Paint the Flower and Leaves
 Start painting the flower.
Paint the flower with dark and light purples.
Loosely paint the flower with a stippling motion.
Use your red-purple, Quinacridone Violet on the light side of the flower.
Use the darker, cooler blue-violet, Dioxazine Violet on the shadow side.
Get more tips on how to use warm and cool colors.
Notice the masking fluid preserves the white highlights on the flower.
Also, paint around some areas leaving the white of the paper.
 Paint the leaves.
Mix and use a variety of grey-greens for the leaves.
Mix the greens from Viridian and Dioxazine Purple.
Paint the leaves with a variety of light and darker greens.
Leave a center vein unpainted on some of the leaves.
For added variety paint the center vein darker on other leaves.
We will paint the stem after the masking fluid is removed.
Paint the Background
 Start painting the background.
Dampen the area you will be painting, so the paint will flow on easier.
Loosely paint the background with a soft flat brush.
Start the lower left corner with Dioxazine Violet.
As you start adding the greens to the background it will grey the violet so it is not so intense.
Loose backgrounds are one of the joys of butterfly art. An artistic background contrasts nicely with the detailed butterfly.
We want the background to compliment, not detract our attention from the focal point. What are other ways to create a focal point?
 Continue painting the background.
Change to warmer violet and a variety of greens farther up in the painting.
Use a smaller brush for the tighter areas.
Paint lighter, subdued greens or lavender in the background areas.
Then using the smaller brush paint some darker greens or violet on top of the lighter areas.
Mingle the background colors together to make them out of focus.
The out of focus background pushes it farther back and brings the butterfly, flower and leaves forward.
 Make the background out of focus.
Above the flower a spray of water mixes the background colors to make them look out of focus.
Use water on the edges of the background to soften the colors as they merge into the white background.
In the tighter areas below the flower, use a damp brush to mingle the colors and soften the edges.
The wet colors flow together. That's the beauty of painting with watercolor.
Let the painting dry.
Finishing Your Butterfly Art
 Remove the masking to reveal the whites.
The painting is dry when it is not cool to the touch.
Now comes the fun part of painting watercolor. It is always exciting to see the whites revealed.
After the painting is dry remove the masking fluid (the frisket) with a rubber cement pick-up tool or your dry fingers.
When the frisket is removed the white paper is revealed!
Vola - there's our highlights.
 Add touches of a pale orange.
One of the ways of painting good art is to repeat colors throughout the painting.
The butterfly is obviously orange.
So, we use a pale orange wash on the edges of the leaves.
The twig in the lower left was painted with brown and orange highlights.
Remember the light source is from the right. So, we highlight the right side of the twig with shadows on the left.
 Paint the butterfly head and antenna.
The flowers on the purple Butterfly Bush have orange centers.
Lightly indicated some orange in a few places on the flowers.
Now we can finish the butterfly's head.
Paint the butterfly's head and leave highlights for the eyes.
A script liner brush works for painting the slender antenna.
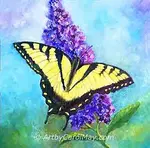
The Painting Is Finished
This is how to paint watercolor butterfly art. The realistic butterfly is meticulously painted over an artistic background that makes the painting more interesting.
White sparks up the painting and the addition of bold colors make this a lively butterfly painting.
 Completed painting
It's Your Turn to Paint
The combination of nature and creativity offers a wonderful opportunity for artists.
Both seasoned and budding artists can express their creativity, perfect their watercolor techniques and add imaginative artwork to their portfolio.
Explore and look deeper into the world of painting art on this website. The vast reservoir of resources is waiting to help you create your next painting.
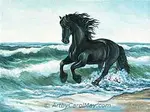
Butterfly Art is Timeless
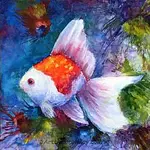
Oil paintings are as timeless as the butterflies.
Enjoy this classic medium while you paint this butterfly.

Paint More Watercolor
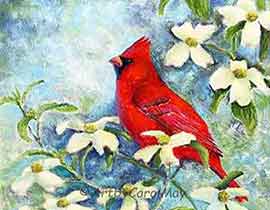
Watercolor is a wonderful medium for painting hummingbirds, too.
Paint this Rufous Hummingbird with only three colors.

More Pages to Enjoy
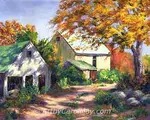
Painting with a Limited Palette: Master Color Harmony
Discover the art of painting with a limited palette. Tune in to color harmony & craft a fun, colorful, harmonious step-by-step painting with only four colors.
Principles of Art Create Wonderful Paintings
Use the principles of art to create successful paintings. Artists create pleasing compositions by using the art elements according to the principles of painting
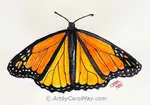
Easy Butterfly Painting: Draw & Watercolor a Monarch
Get creative with an easy butterfly painting tutorial. Discover the joy of drawing and painting a vibrant Monarch Butterfly with simple watercolor techniques.
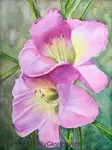
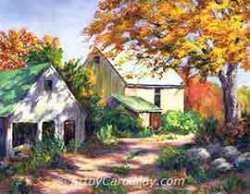
Painting Daylilies: A Watercolor Flower Tutorial
Start painting daylilies with a step-by-step watercolor tutorial by artist Carol May. Watercolor is easy to use, the perfect medium for painting pink flowers.


Recent Articles
-
Create a Focal Point
Dec 05, 25 02:00 PM
 How do we create a focal point in art? Where do we put the focal point? How do we find the focus of an artwork? Should all paintings have a center of interest or can they have more than one? Learn fro…
 -
How Do We Use The Principles of Art?
Nov 21, 25 09:00 AM
 Art elements and principles appear over and over in good paintings. The elements and principles work together for us to create successful artwork. Art principles are the rules that govern how an artis…
 -
What is the Meaning of Colors?
Nov 07, 25 08:00 AM
 Artists often use the meaning of color to convey emotions, sentiments, and symbolism. Are you intrigued by the idea that colors can enhance or suppress different aspects of your paintings? Let's look…
Recent Articles
-
Create a Focal Point
Dec 05, 25 02:00 PM
How do we create a focal point in art? Where do we put the focal point? How do we find the focus of an artwork? Should all paintings have a center of interest or can they have more than one? Learn fro… -
How Do We Use The Principles of Art?
Nov 21, 25 09:00 AM
Art elements and principles appear over and over in good paintings. The elements and principles work together for us to create successful artwork. Art principles are the rules that govern how an artis… -
What is the Meaning of Colors?
Nov 07, 25 08:00 AM
Artists often use the meaning of color to convey emotions, sentiments, and symbolism. Are you intrigued by the idea that colors can enhance or suppress different aspects of your paintings? Let's look…